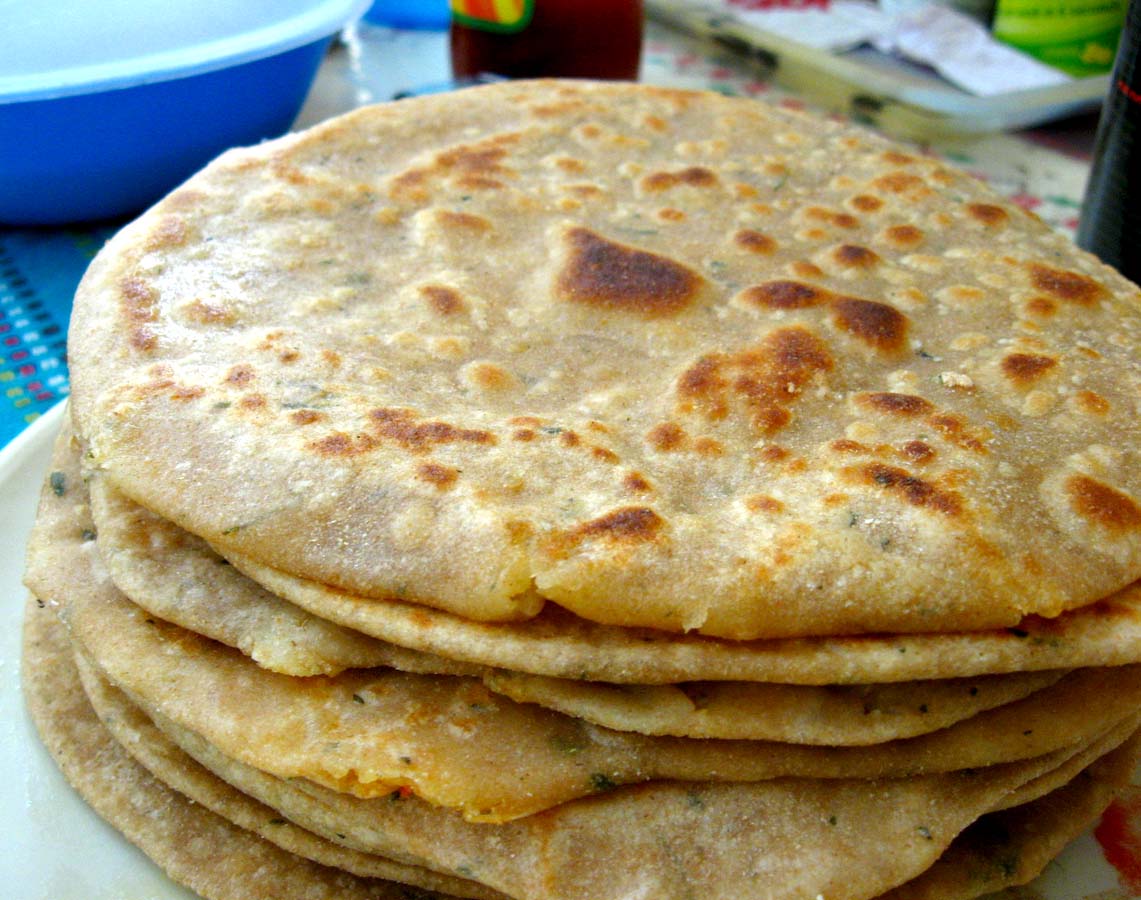
Soft Chapati Recipe (Step-by-Step Roti Guide for Beginners)
A soft chapati recipe should be light, tender, and pliable enough to tear with two fingers—even hours after packing it into a lunch box. While making everyday Indian flatbread requires only whole wheat flour (atta), water, and a pinch of salt, getting them consistently soft and puffed comes down to three physical factors: sufficient hydration, dough resting time, and correct tawa heat management.
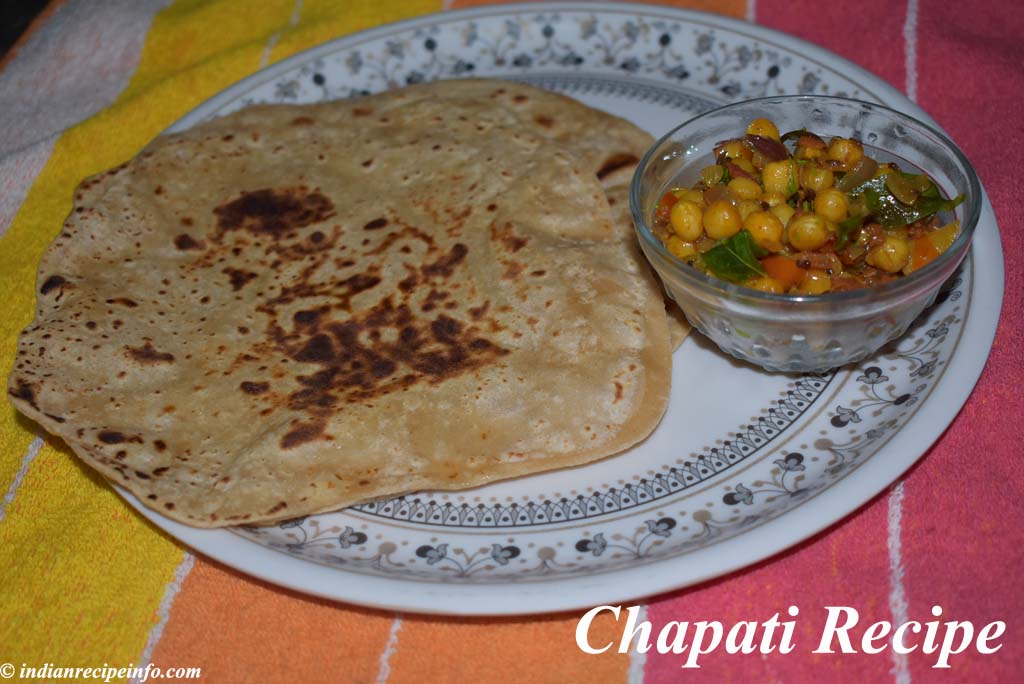
This guide covers the exact flour-to-water ratio, tactile kneading checkpoints, rolling techniques, and the reliable “three-flip” roasting method on a tawa.
What Makes a Chapati Truly Soft?
A chapati turns soft when water gets trapped inside the dough during kneading and converts instantly to steam on a hot tawa. That steam forces the upper and lower layers apart, puffing the roti like a balloon.
To achieve this:
- Hydrate thoroughly: Whole wheat atta contains bran, which absorbs water slowly. Give the flour enough liquid.
- Rest the dough: A mandatory 15 to 20-minute rest allows the gluten network to relax and the bran to absorb moisture fully, preventing rubbery dough.
- High, steady heat: Low tawa heat bakes the moisture out slowly, turning the flatbread brittle and hard. Medium-high heat cooks it rapidly, locking steam inside.
Ingredients & Proportions
| Ingredient | Measurement (for 8–10 Chapatis) | Purpose |
| Whole Wheat Atta | 2 cups (240 g) | Traditional stone-ground (chakki) atta yields the best softness and flavor. |
| Water (lukewarm) | ¾ cup to 1 cup (180–240 ml) | Lukewarm water softens the gluten faster than cold water. |
| Salt | ½ tsp (optional) | Enhances natural wheat flavor; adjust to taste. |
| Oil or Ghee | 1 tsp (for dough) + extra for brushing | Adds elasticity and locks in moisture during storage. |
| Dry Atta for Dusting | ¼ cup | Used sparingly on the rolling board (chakla). |
Ingredient Notes & Substitutions
- The Atta: Use Indian whole wheat flour (chakki atta like Aashirvaad, Pillsbury, or freshly ground local wheat). Western whole-wheat bread flour or all-purpose flour (maida) will not produce the same tender texture due to differences in bran grind and protein structure.
- Water Temperature: Lukewarm water works fastest to yield a supple dough. On cold days, warm water is essential to prevent stiffness.
- Oil/Ghee in Dough: While traditional daily rotis can be made without any fat, working 1 teaspoon of oil into the dough after the initial knead helps seal moisture, particularly if you are packing them for travel or office lunch boxes.
Prefer a visual walkthrough? Watch our step-by-step 3-layered soft Chapati Recipe video on YouTube or play it directly below:
Step-by-Step Instructions: How to Make Soft Chapati
Step 1: Mix the Flour and Liquid
- In a wide mixing bowl (parat), add 2 cups of whole wheat atta and ½ teaspoon of salt. Mix well with your fingers.
- Make a small well in the center. Pour in ½ cup of lukewarm water to start.
- Begin bringing the flour together in circular motions. Add the remaining water 1 to 2 tablespoons at a time, incorporating all dry flour until a shaggy, cohesive mass forms.
- Visual Cue: The bowl should be clean with no loose dry flour clinging to the sides. The dough will feel sticky at this point.

Step 2: Knead to a Soft Texture
- Knead the dough using the heel of your palms: push the dough away from you, fold it back over itself, turn 90 degrees, and repeat.
- Continue kneading for 4 to 5 minutes.
- Pour 1 teaspoon of oil over the dough and knead for another 1 to 2 minutes until the surface is smooth, pliable, and non-sticky.
- Softness Test: Press your index finger gently into the dough ball. It should leave an indentation that slowly springs back halfway. If the dough feels stiff like an eraser, wet your hands and knead for 2 more minutes.
- Cover the dough with a damp kitchen towel or an inverted bowl and let it rest for 15 to 20 minutes. Do not skip this rest.
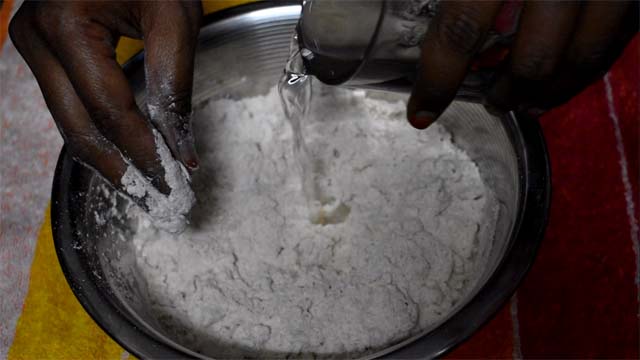
Step 3: Divide and Shape
- Uncover the rested dough. Give it a gentle 30-second knead.
- Divide the dough into 8 to 10 equal portions (roughly golf-ball-sized, about 35–40 grams each).
- Roll each portion between your palms into a smooth ball with no cracks on the surface. Flatten the ball slightly between your palms to form a disc.
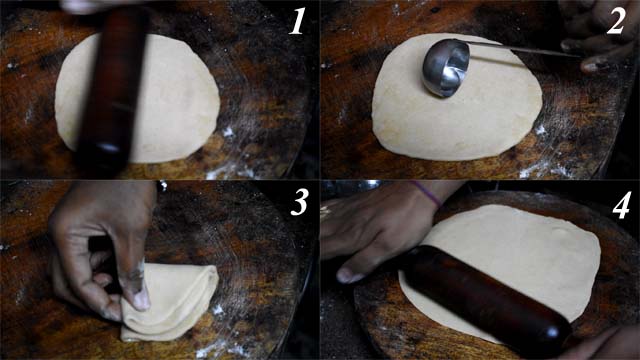
Step 4: Roll the Chapati Evenly
- Lightly dip one dough disc into dry flour (parthan), shaking off any excess. Place it on the rolling board (chakla).
- Using a rolling pin (belan), roll from the center outward toward the edges applying light, even pressure.
- Apply pressure primarily on the outer edges rather than pressing down hard in the center. With a light touch, the round disc will naturally rotate clockwise on the board with each stroke.
- Roll until you have a uniform circle 6 to 7 inches in diameter and roughly 1.5 to 2 mm thick.
- Check: Avoid using excess dusting flour; too much dry flour on the surface will burn on the hot tawa and turn the chapati bitter and dry.
Step 5: The 3-Flip Roasting Technique
Heat a heavy cast-iron or aluminum tawa over medium-high heat. Test the heat: flick a drop of water onto the surface; it should sizzle and evaporate within 2 seconds.
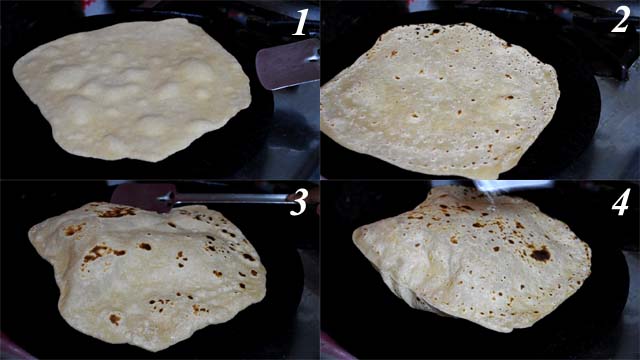
- First Side (15–20 Seconds): Gently place the rolled chapati onto the center of the dry tawa. Let it cook over medium-high heat until you see small, tiny bubbles forming on the top surface and the color slightly deepens. Do not let it brown on this side.
- Second Side (30–40 Seconds): Flip the chapati using a flat spatula or tongs (chimta). Cook this second side longer until visible light-brown spots appear all over the underside. Lift an edge with tongs to verify.
- The Puff (Third Flip – 10–15 Seconds): Flip the chapati back to the first side. Using a folded clean cotton cloth or the flat back of a spatula, gently press the edges where steam starts accumulating. The chapati will inflate into a full, rounded balloon.
- Remove the puffed chapati immediately from the tawa. Do not keep pressing or cooking once puffed, or the trapped moisture will evaporate, causing stiffness.
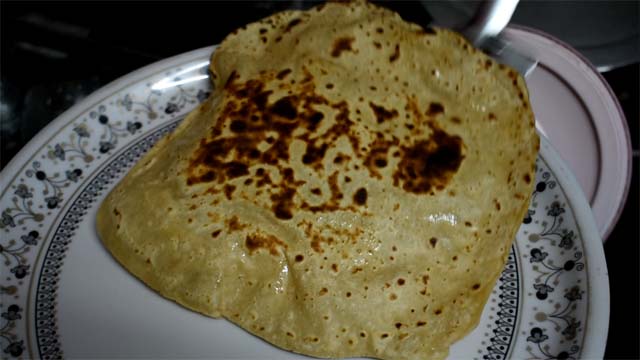
Optional Finish: Brush lightly with homemade ghee or butter while still hot, then transfer immediately to an insulated casserole lined with a cotton cloth.
5 Practical Rules for Consistently Soft Rotis
- Hydration Beats Effort: If your dough is stiff when you start, no amount of heavy kneading will make the finished roti tender. The dough should feel noticeably softer than poori dough.
- Dust Spaciously, Brush Clean: Dust the dough ball in dry flour only once at the beginning and once lightly halfway through rolling if sticky. Before putting it on the pan, gently slap the rolled disc between your palms once to drop excess dry flour.
- Preheat the Pan Thoroughly: Never place a chapati on a cold or lukewarm tawa. Insufficient pan heat extends cooking time and bakes the bread dry like a cracker.
- Target the Edges While Rolling: If the edges are thick and the center is paper-thin, the chapati will neither cook evenly nor puff, leaving the circumference chewy and raw.
- Steam Cushioning: Always line your storage container (roti dabba or casserole) with a breathable cotton cloth or paper towel. Placing hot chapatis directly on metal or plastic traps condensation, turning the bottom roti completely soggy.
Common Mistakes and How to Fix Them
Why is my chapati hard and biscuit-like?
- Cause: The tawa was not hot enough, causing the chapati to cook for too long, or the dough was under-hydrated.
- Fix: Increase the burner flame to medium-high. Ensure total pan time per chapati stays under 90 seconds.
Why won’t my chapati puff up?
- Cause 1: Uneven thickness or a small tear during rolling. A tear acts like an open exhaust valve, letting the steam escape before pressure can build.
- Cause 2: The second side was undercooked before making the final puffing flip. Ensure the second side has well-developed brown speckles before flipping.
Why is the chapati dough stiff and snapping back during rolling?
- Cause: The dough was rolled immediately without resting, leaving the gluten strands tight and contracted.
- Fix: Cover the dough ball and let it sit undisturbed for 15 minutes before shaping.
Why does the chapati taste raw along the borders?
- Cause: Rolling pressure was focused purely on the center, leaving outer borders thick.
- Fix: When roasting, press gently along the perimeter with a clean folded cloth to ensure thick rim sections make contact with the tawa.
Legitimate Variations
- Phulka (Direct Flame Method): Follow the exact same dough and rolling procedure. After cooking the second side on the tawa for 30 seconds, pick up the roti with tongs, set the tawa aside, and place the first side directly over the open gas flame on high heat. It will inflate instantly within 3 to 5 seconds. Flip briefly (1 second) and remove.
- Layered Dosti / Triangle Roti: Roll the dough ball into a small 4-inch disc, brush with a drop of ghee, fold into a semi-circle, brush lightly again, fold into a triangle, and roll out evenly. This produces distinct flaky internal layers.
- Travel Roti (Extended Softness): Knead the atta using lukewarm milk instead of plain water, and increase the oil in the dough to 1 tablespoon. These remain soft at room temperature for up to 36 hours.
What to Serve With Chapati
Chapatis serve as an everyday, neutral flatbread designed to scoop up spiced gravies and dry stir-fries:
- Everyday Dals: Homestyle Yellow Moong Dal, Tadka Dal, or Chana Dal.
- Dry Sabzis: Aloo Gobi, Bhindi Masala, Jeera Aloo, or Cabbage Poriyal.
- Rich Curries: Paneer Butter Masala, Matar Paneer, or homestyle Chicken Curry.
Storage, Reheating & Lunch Box Packing
For Lunch Boxes / Dabbas
Stack warm chapatis directly on top of each other after a light brush of ghee. Wrap the whole stack in a clean cotton muslin cloth or parchment paper before sealing inside an airtight lunch box. The cloth absorbs condensation while trapping heat, keeping the breads soft until lunchtime.
Refrigerator Storage
- Storing Rolled Cooked Chapatis: Cool the cooked chapatis completely to room temperature. Stack them with small squares of parchment paper between each piece, seal inside a zip-lock bag or airtight container, and refrigerate for up to 3 days.
- Reheating: Heat a tawa over medium-high flame. Place the cold chapati on the dry pan for 15 seconds per side until hot and flexible. Avoid microwaving without a damp paper towel cover, as microwaves evaporate residual moisture quickly, leaving the edges leathery.
Frequently Asked Questions
Can I knead chapati dough in a food processor or stand mixer?
Yes. Add 2 cups of atta and salt to the food processor bowl with the dough blade attached. Pulse once. Pour in ¾ cup water gradually through the feed tube while running on low speed until it forms a cohesive ball. Remove and rest for 15 minutes as usual.
How much water is needed for 1 kg of wheat atta?
On average, 1 kg of Indian whole wheat chakki atta absorbs roughly 600 ml to 650 ml of water (approx. 2.5 to 2.75 cups), depending on the grain quality, ambient humidity, and milling coarseness.
Can I keep chapati dough in the fridge overnight?
Yes. Store the kneaded dough in an airtight container with a thin smear of oil on top to prevent a dark crust from forming. Bring it to room temperature for 20 minutes before rolling, as cold dough will be stiff and prone to cracking.
Soft Whole Wheat Chapati (Roti)
Chapati recipe or roti recipe is one of the staple recipes from North India. If you are diet conscious, it is recommended to have chapati every day.
Ingredients
- 2 cups 240 g whole wheat atta (chakki ground preferred)
- ¾ to 1 cup 180–240 ml lukewarm water (adjusted to dough feel)
- ½ tsp salt optional
- 1 tsp cooking oil for dough kneading
- ¼ cup dry wheat flour for dusting
- 1 tbsp ghee or oil optional, for brushing finished chapatis
Instructions
Combine: In a wide bowl, blend atta and salt. Pour in ½ cup lukewarm water and begin bringing the flour together.
Hydrate & Knead: Add remaining water 1–2 tbsp at a time until a soft, slightly sticky ball forms. Add 1 tsp oil and knead with the heels of your hands for 4–5 minutes until pliable and smooth.
Rest: Cover the dough with a damp cloth; rest for 15–20 minutes.
Portion: Divide rested dough into 8–10 equal, crack-free balls.
Roll: Dust one ball lightly with dry flour. Roll from the center outward on a board, exerting gentle pressure on edges to form a thin, uniform 6–7 inch circle.
First Flip: Place rolled dough onto a preheated, medium-hot dry tawa. Cook for 15–20 seconds until tiny air bubbles emerge.
Second Flip: Flip with tongs; cook second side for 30–40 seconds until light-brown speckles appear underneath.
Puff (Third Flip): Turn back to the first side. Press edges gently with a clean folded cloth or spatula to encourage complete puffing.
Finish & Store: Transfer immediately to a cloth-lined container; brush lightly with ghee if desired. Repeat with remaining dough balls.
Recipe Notes
Heat Setting: Maintain steady medium-high heat. Cooking over low flame dries out the flatbread.
Dusting Flour: Shake off extra dry flour before placing the rolled dough on the pan to avoid burnt spots.
Storage: Keep stacked inside a breathable cotton cloth placed inside an airtight container.